How to Disassemble & Reassemble Your Glock 19 (Beginner's Guide)
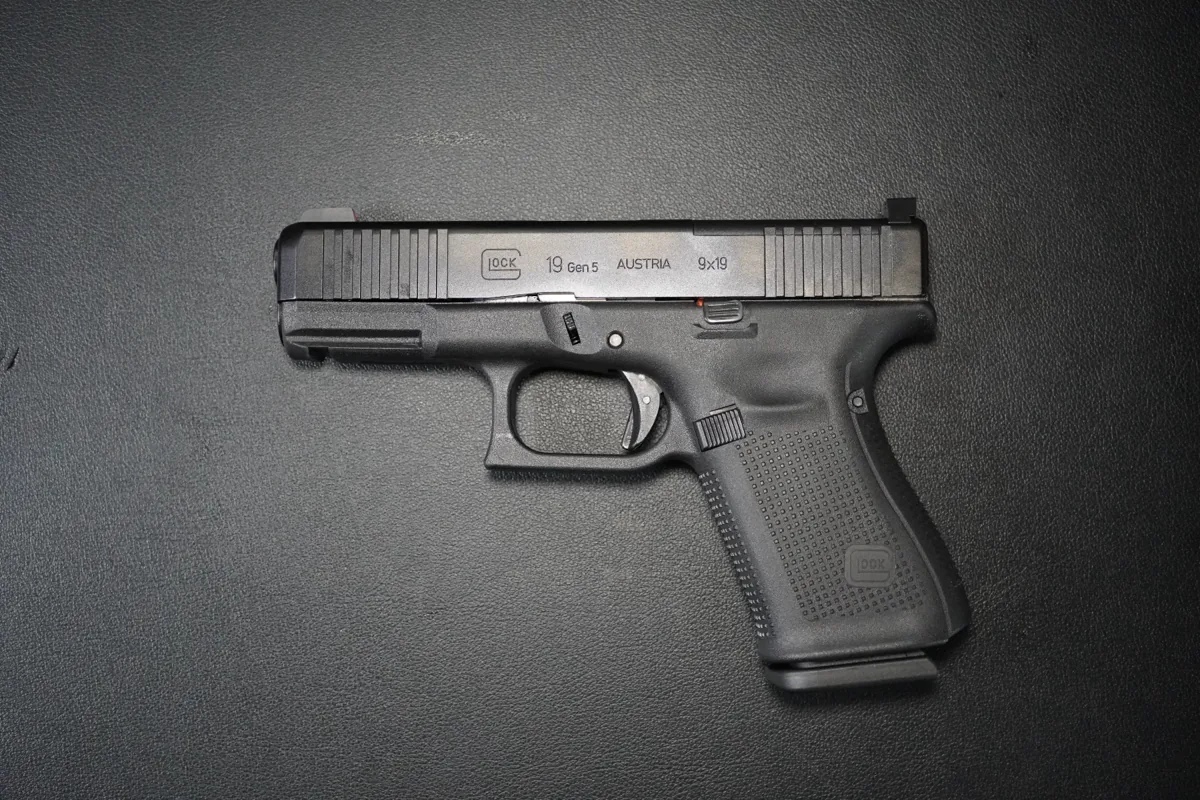
If you're new to the Glock 19, this guide is written for you. Glock disassembly is simple once you know the order, but the order matters a lot, especially because the slide does not come off until after a trigger press in a safe direction.
This guide is written for beginners and follows the official GLOCK owner manual. For the latest factory diagrams and instructions, download the official manual from GLOCK's downloadable materials page.
This is only for routine field stripping for cleaning and basic inspection. Do not go beyond these major components unless you're using a GLOCK-Certified Armorer.
Before You Start
Before touching the pistol:
- Remove all live ammunition from the work area.
- Wear safety glasses. The GLOCK manual specifically calls this out for disassembly and reassembly.
- Keep your finger off the trigger until the step where the manual tells you to press it.
- Do not rely only on the loaded chamber indicator or your memory. Check the chamber and magazine well yourself.
The 3 Controls You Need to Know
If you've never taken a Glock apart before, these three names make the rest of the guide much easier:
- Magazine catch / magazine release: the button you press to remove the magazine.
- Slide stop lever: the thin lever used to lock the slide open.
- Slide lock: the two small takedown tabs above the trigger area. You pull these down to remove the slide.
Part 1: Safety First
Step 1. Remove the magazine by pressing the magazine catch.
This only removes the magazine. It does not automatically empty the chamber.
Step 2. With your finger off the trigger and outside the trigger guard, grasp the rear serrations and pull the slide fully to the rear to eject anything that may be in the chamber.
The rear serrations are the ridged grooves at the back of the slide.
Step 3. Push up on the slide stop lever and slowly let the slide lock open.
Step 4. Visually and physically inspect both the chamber and the magazine well. Look into the chamber, then feel into it with a finger. Also check the magazine well to make sure no magazine or loose round is still there.
Step 5. Release the slide and let it return to the forward position.
Step 6. Point the pistol in a safe direction and pull the trigger.
If Step 6 makes you uneasy, that's normal. For a Glock, that is exactly why Step 4 matters so much. Do not rush it, and do not skip it.
Part 2: Disassembly (Field Strip)
Step 7. Hold the pistol in your firing hand with your fingers across the top rear of the slide, in front of the rear sight, and your thumb on the rear of the frame.
You are setting up to control the slide as it comes off. Nothing should fly apart, but this grip keeps the movement small and controlled.
Step 8. Retract the slide only about 1/8 inch, or roughly 3 mm, and hold it there.
This is the part most beginners overdo. You are not racking the slide again. You just want a tiny rearward movement, barely enough to feel it move. If you pull too far back, the trigger resets to the forward position. If that happens, point the pistol in a safe direction and pull the trigger again before continuing.
Step 9. While holding the slide in that slightly rearward position, use your support-hand thumb and index finger to pull the slide lock down evenly on both sides. These are the two small takedown tabs above the trigger area.
Step 10. Keep the slide lock pulled down and guide the slide forward off the frame.
The slide comes straight forward off the front of the frame. If it does not move, the usual reason is that the slide was pulled too far back in Step 8 and the trigger reset.
If the slide does not come off:
- Make sure the trigger was pressed in Step 6.
- Make sure you moved the slide only a tiny amount in Step 8.
- Make sure both sides of the slide lock are being pulled down together.
Step 11. Press the recoil spring assembly slightly toward the muzzle, then lift it out of the slide.
Lift it out slowly and keep control of it. It is under spring tension.
Step 12. Lift the barrel by the locking cams, move it slightly toward the front of the slide, then lift it up and out toward the rear.
Once the recoil spring assembly is out, the barrel usually lifts out easily.
That's all you need for routine field stripping.
The GLOCK manual says not to further disassemble the pistol beyond this point unless the work is being done by a GLOCK-Certified Armorer.
Part 3: Reassembly
Step 13. Reinsert the barrel into the slide and seat it fully.
Set the front of the barrel into the slide first, then lower the rear into place.
Step 14. Reinstall the recoil spring assembly. Put the small end into the front of the slide, compress it slightly, and seat the large end in the second semi-circular notch on the barrel locking cams.
That second notch matters. The rear end of the spring assembly should look centered and stable, not crooked or half-seated. If the recoil spring assembly is not seated correctly, the pistol may not cycle correctly.
Step 15. Place the slide on the frame rails and push it straight to the rear until it snaps into place.
You do not need to pull the slide lock down for reassembly. Just line the slide up with the frame rails and push it straight back.
Part 4: Quick Inspection
After reassembly, the manual recommends a basic inspection. With the pistol still unloaded, do these three checks:
- Trigger safety test. Cycle the slide to reset the trigger, then try to pull the trigger by pressing on the sides of it without depressing the center trigger safety. The trigger should not move rearward and the pistol should not dry fire.
- Trigger reset test. Pull the trigger and hold it to the rear. Rack the slide, then slowly release the trigger. It should reset forward with a noticeable click.
- Slide lock-open test. Insert an empty magazine and pull the slide fully to the rear. The slide should lock open.
That's it. Once you understand the order, a Glock 19 field strip is straightforward. For most beginners, the entire process gets easy as soon as two things click: the chamber check must happen before the trigger press, and the slide only moves back a tiny amount before you pull down the slide lock.
Keep the official manual handy for factory diagrams and model-specific details: GLOCK downloadable materials.
Log each cleaning in RangeReady so your round counts and maintenance history stay in one place.
Keep reading
How to Disassemble & Reassemble Your P365 (Beginner's Guide)
A step-by-step beginner's guide to safely field strip and reassemble the SIG Sauer P365 — with short video clips for each step.
How to Clean & Lubricate Your P365 (Beginner's Guide)
A beginner-friendly guide to cleaning and lubricating the SIG Sauer P365 after field stripping it, based on the operator manual.